


Make your OWN Davidovich Bagels + Book
Make your OWN Davidovich Bagels + Book
Couldn't load pickup availability

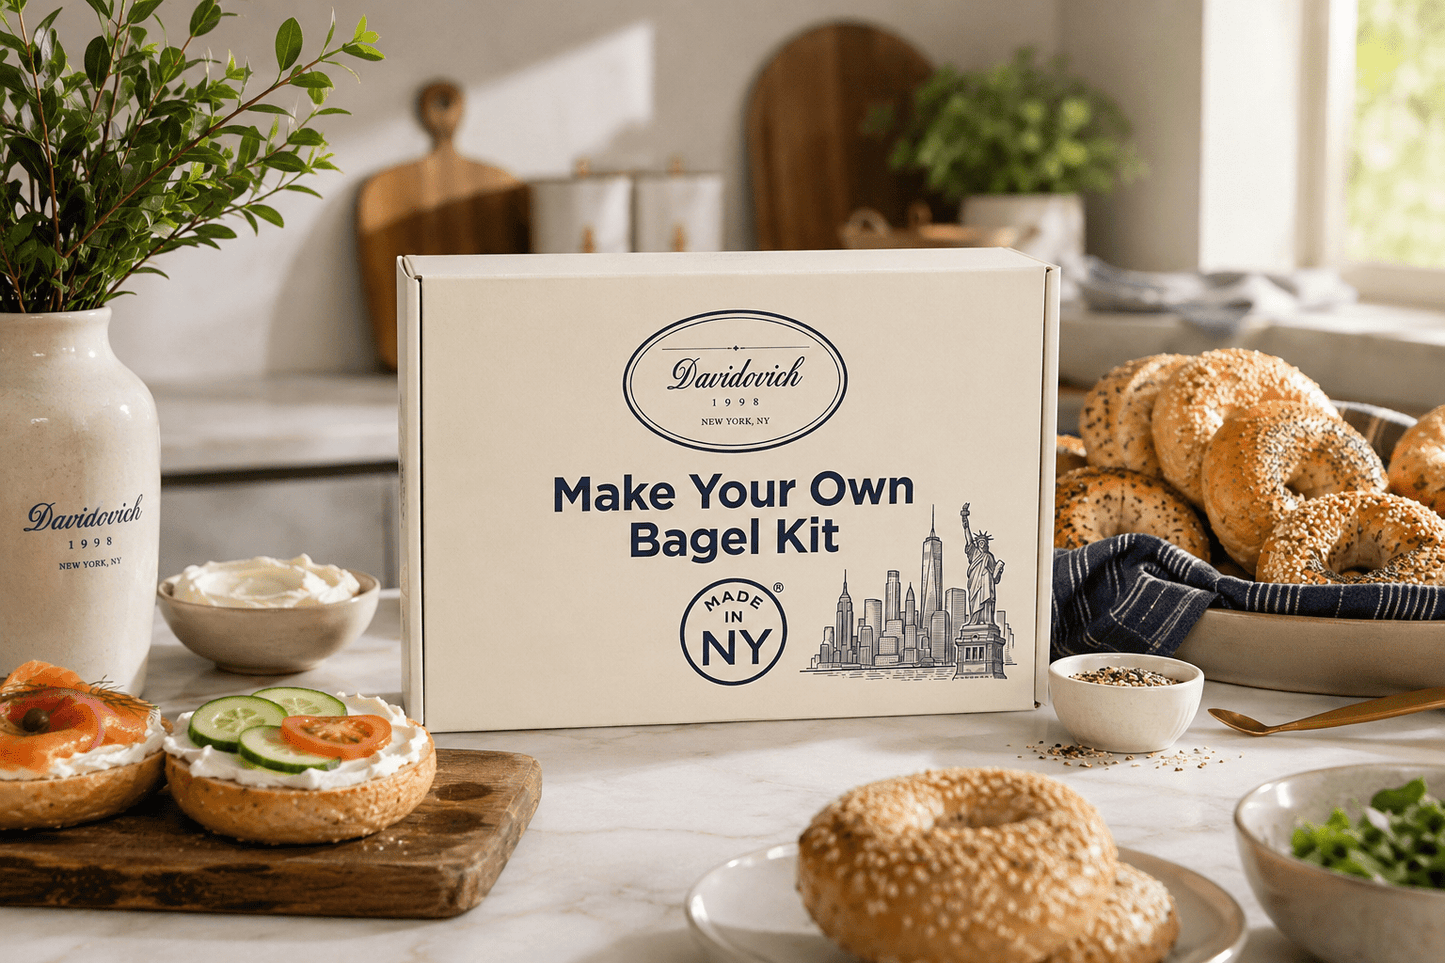
DAVIDOVICH BAGELS – CRAFT YOUR OWN LEGENDARY NEW YORK-STYLE BAGELS AT HOME!
Get ready to transform simple ingredients into chewy, glossy, golden bagels that rival the best delis in the
city. This cold-proof method builds incredible flavor and that signature dense, springy texture. Patience
pays off—your kitchen is about to smell like a fresh-baked dream!
You’ll need:
Your Davidovich kit: Bag (marked #1) (flour mix ~1.5 lb) + Bottle (marked #2) (yeast
packet) + NYC’s Famous Bagel Water Bottle (marked #3) topping mix (poppy, sesame, everything)
Large mixing bowl + separate small bowl
Stand mixer with dough hook (or strong hands!)
Baking sheet + parchment paper or silicone mat
Large pot for boiling
Slotted spoon or spider strainer
Clear plastic wrap
Step 1: Activate the Magic (Yeast Bloom) Pour about 1 cup (8 oz / 240 ml) warm water (105–115°F /
40–46°C) into a small bowl. Dump in the entire Bottle 2 yeast packet. Stir until it dissolves into a cloudy,
frothy potion. Let it sit and wake up for 5 minutes — it should look bubbly and smell yeasty. (If it doesn’t
foam, your water is too hot/cold or the yeast is sleepy—start over!)
Step 2: Bring the Dough to Life Dump Bag 1 (the full flour mix) into your large bowl. Slowly pour in
the yeasty water while mixing by hand or on your mixer’s lowest speed. Once it starts coming together
(shaggy at first—totally normal!), add another ~¾ cup (6 oz / 180 ml) warm water gradually.
Knead/mix on low for 10–15 minutes until the dough is smooth, elastic, and slightly tacky (it should pull
away from the bowl sides but stick a little to the bottom). Pro tip: This long knead develops that iconic
chew—don’t rush it!
Step 3: Shape the Future Bagels Divide the dough into ~3 oz pieces (golf-ball size; aim for 8–10
bagels). Roll each piece into a tight 10-inch rope (“snake” style). Watch this quick pro technique:
https://www.youtube.com/watch?v=qri4OaNr-E0 (Quick recap: Hold the rope with both hands, roll back
and forth while tapering the ends slightly. Wrap one end around your hand or overlap ~1 inch, pinch/seal
firmly, and roll the seam on the counter to blend it perfectly. Stretch the center hole so it’s generous—it
shrinks during proofing & boiling!)
Step 4: The Slow Magic – Cold Proof Place shaped bagels on a parchment-lined baking sheet, spaced
~½–1 inch apart (they’ll puff!). Cover loosely with plastic wrap. Slide into the refrigerator for 12–24
hours. This slow, cold ferment = deeper flavor + perfect texture. (24 hours is ideal for maximum chew
and tang!)
Step 5: Wake & Preheat Remove bagels from fridge; let them sit at room temp ~20 minutes while you
preheat. Crank your oven to 475–500°F (245–260°C) — hot is key for that shiny, crisp crust! Place rack
in middle or upper-middle position.
Step 6: The Iconic Boil Bring a large pot of water to a rolling boil. Stir in 1–2 tsp honey or sugar (raises
boiling point for better crust). Gently drop 3–4 bagels in at a time (don’t crowd). Boil 45–60 seconds per
side (flip once with a slotted spoon). They’ll float when ready—give them a gentle stir so they cook
Longer boil = thicker, chewier crust; shorter = lighter. Remove, drain briefly, and place back on the lined sheet.
Step 7: Topping Time – Get Creative! While bagels are still steaming wet from the boil (this is glue!),
sprinkle generously with your Davidovich topping mix (poppy, sesame, everything). Or go wild—dip
wet bagels into a bowl of toppings for full coverage. Pro move: Egg wash optional for extra shine, but the
wet surface usually sticks perfectly.
Step 8: Bake to Golden Perfection Slide sheet into a steaming-hot oven. Bake 20–30 minutes, rotating
halfway. They’re done when deep golden-brown and sound hollow when tapped on the bottom. (Pro tip:
If bottoms brown too fast, place a sheet of foil loosely underneath or lower to 450°F after 10 minutes.
Toothpick test inside one—clean or few crumbs = ready!)
Step 9: The Hardest Part – Cool & Enjoy Transfer to a wire rack. Resist! Let cool for at least 15–20
minutes (hot dough is gummy; cooled bagels reveal perfect chew). Slice, toast, schmear with cream
cheese, pile on lox… or just tear in like a true New Yorker.
You did it—you just made authentic, bakery-fresh bagels at home. Share your masterpieces with us
@davidovichbakery or tag #DavidovichHomemadeBagels. Fresh from your oven beats any line at the shop!
(Feel free to tweak oven times for your specific oven—every home setup is a little different.


